Once you have connected an app to Appress using the connection token via the plugin, you will be able to access and configure the settings for your app. If you haven’t been able to connect your app on your website yet, please refer back to the Quick Start.
Build Information
Build Information is where you enter the details required to generate your mobile app file.
Note: If your app has already been published to the stores, changing this information will require uploading a new version file to the stores and waiting for approval
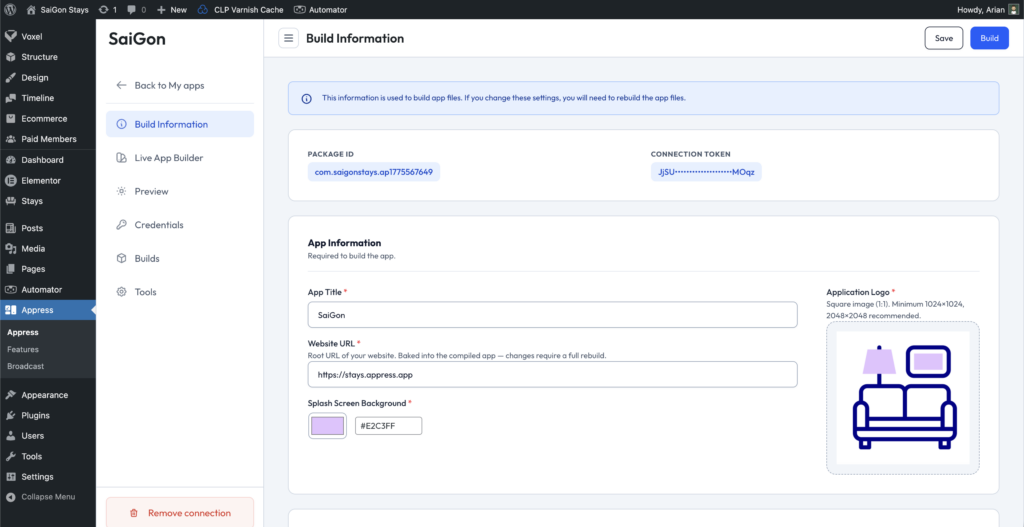
Package ID
Package ID is a unique ID automatically generated for each app when you register it on Appress. It cannot be edited and serves as your app’s identifier when publishing to the stores.
App Information
App Title
App Title is the name of your app as it appears on the App Store, Google Play, and on users’ mobile devices.
Website URL
The root URL of your website, used to handle requests from the mobile app. For example: yourdomain.com.
Splash Screen Background
Splash Screen is the screen that appears every time a user opens your app. It displays your app’s logo on both Android and iOS.
The settings below are required for building the actual app file. If you’re only previewing your app with Appress Preview, you can skip the Firebase and iOS configuration sections.
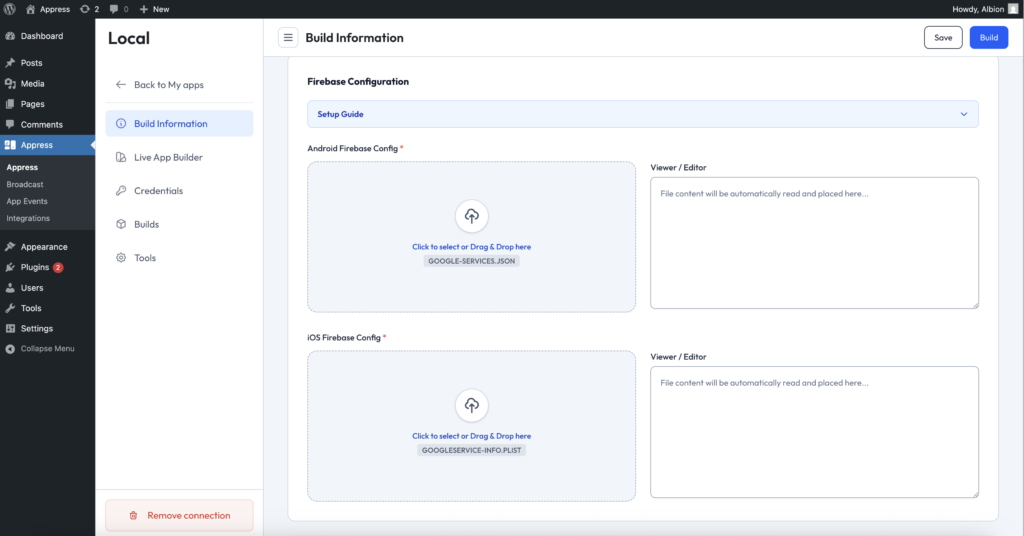
Firebase Configuration
To use features like Google native login and push notifications, you’ll need to upload the Firebase configuration files generated from Firebase.
These files allow you to enable these features whenever needed, and also help improve your chances of approval on the app stores.
You’ll need to create two Firebase configuration files — one for iOS and one for Android — by following the setup guide.
iOS Signing

When packaging your mobile app for iOS, Apple requires this information to sign and verify your app bundle. It serves as the encrypted credentials used for validation when you submit your app to the App Store.
If you plan to build an iOS app, you’ll need to provide this information.
Android Signing
Android Signing holds the cryptographic keys used when building the APK. It is generated automatically on each build by Appress — you can skip this section unless you have advanced requirements
Live App Builder
Live App Builder is where you can edit, modify, and update your app’s interface. Changes take effect immediately once you click Update & Users will receive the latest updates when they close and reopen the app on their device. — no need to rebuild your mobile app or submit an update to the stores.
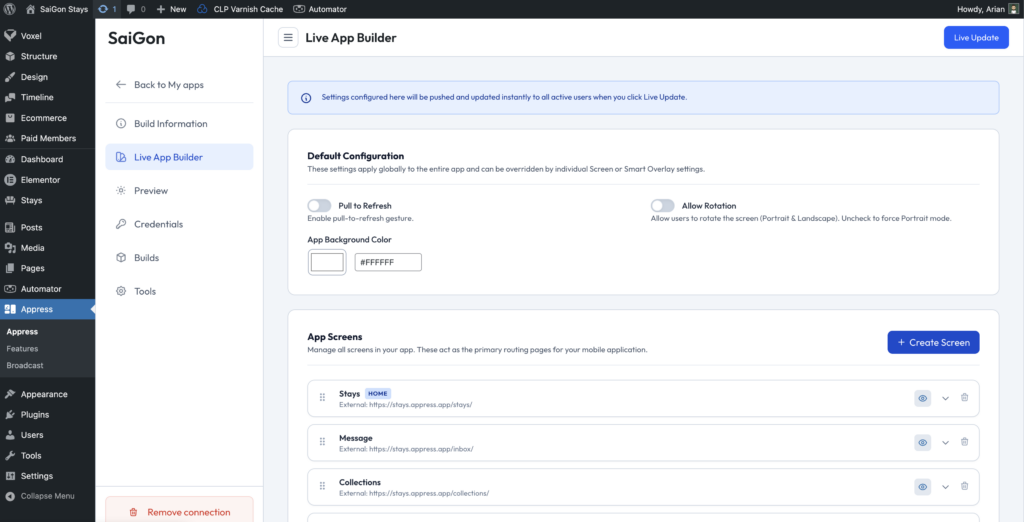
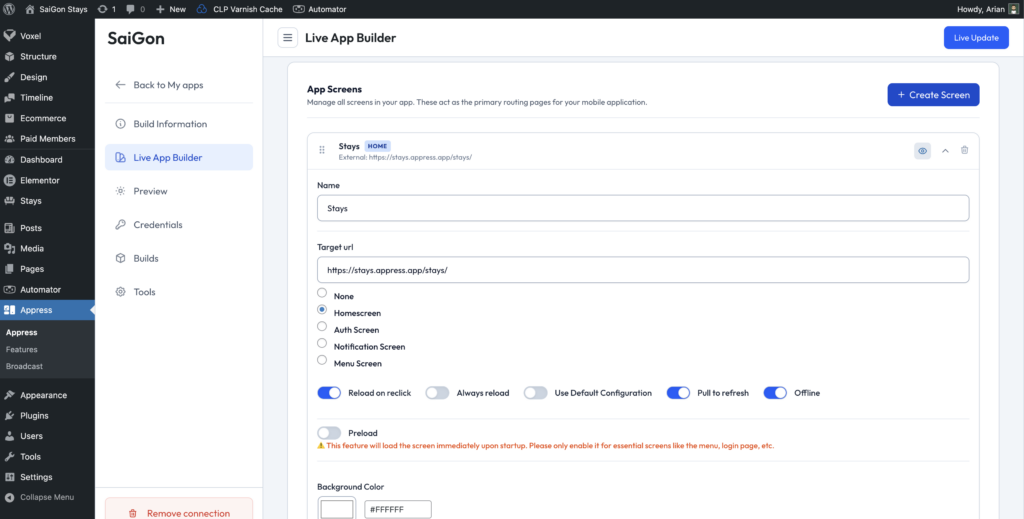
App Screens
To design your mobile app’s interface, start by adding the main screens your app needs. Each screen is mapped to a specific URL on your website and provides the same functionality as the corresponding web page.
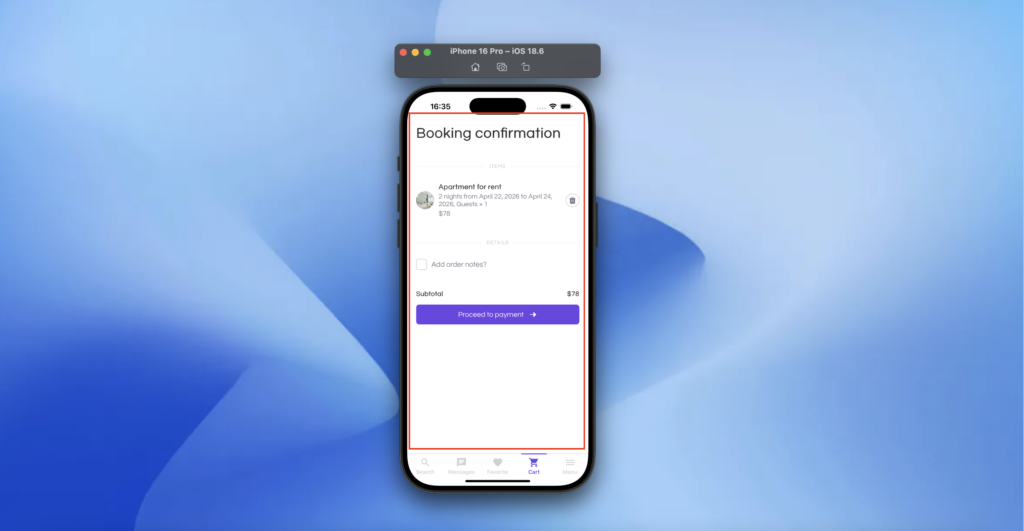
Example: A typical e-commerce app usually consists of the following screens:
- Product search
- Cart
- Wishlist
- Account
- Menu
Screen item settings
Depending on each screen and the functionality it contains, different settings may be required. Below are the settings available for each screen.
Reload on reclick
This feature automatically reloads the screen to its default URL when a user taps the bottom navigation item of the screen they’re currently viewing.
Example: Suppose a user is on the search screen, has scrolled to page 3, and applied several filters. When they tap the Search item in the bottom navigation again, the screen resets to its original URL. This behavior is similar to Facebook — tapping a bottom nav item again refreshes the feed back to the top.
Whether this behavior is needed depends on the screen. For example, a menu screen or a screen that doesn’t rely on database-driven content usually doesn’t need it.
Always reload
By default, this feature isn’t needed for most screens. However, some screens contain complex data that needs to be refreshed every time the user navigates to them from another screen. In those cases, this feature automatically reloads the URL and fetches the latest data — useful when the content isn’t dynamically updated via JavaScript.
Pull to refresh
Pull to refresh is a feature that should be enabled for most screens, allowing users to manually refresh the screen by swiping down from the top of the layout. Exceptions include special screens such as login, logout, or the menu screen (see below).
This setting overrides the Pull to refresh option in Default Configuration.
Bottom Navigation
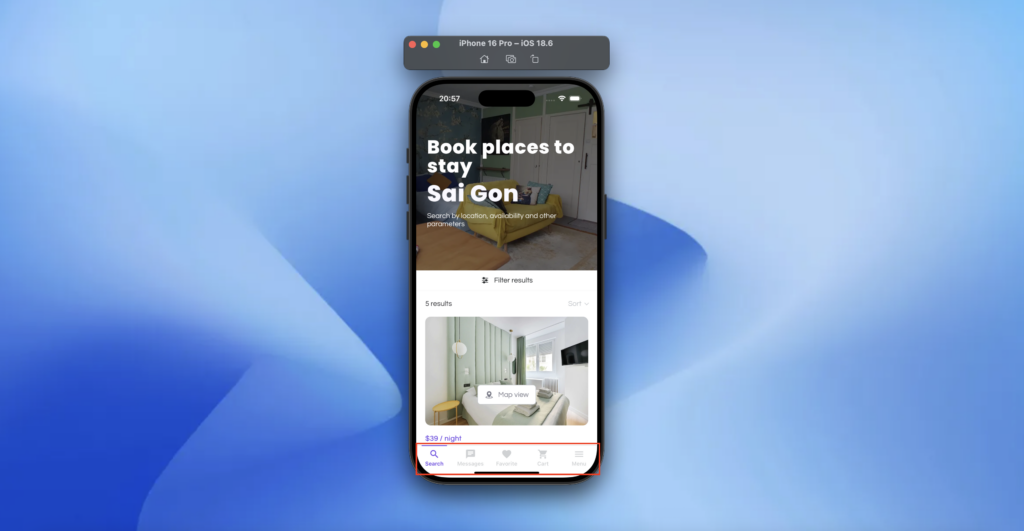
Bottom navigation is a common UI element used in most mobile apps, providing quick access to key sections of your app.
Once you’ve added your screens, you can enable bottom navigation and add items that link to:
- A specific screen — tapping the item opens that screen.
- A menu — tapping the item opens a menu (see details below).
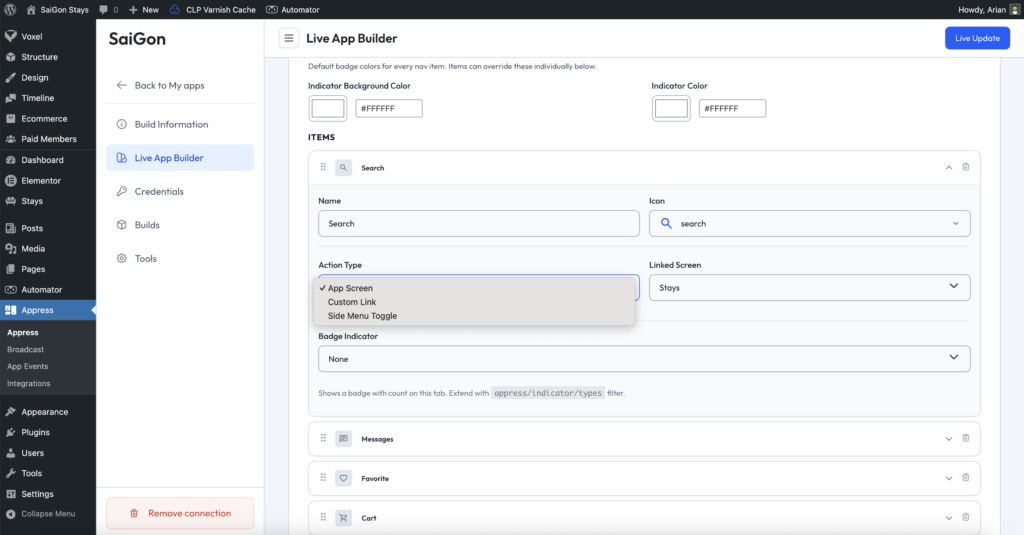
To set up bottom navigation, add items in the order they should appear in your app. Each item can be one of the following:
- An existing app screen you’ve already added.
- A custom URL that opens a specific web page.
- A side menu that opens a slide-out menu (see below).
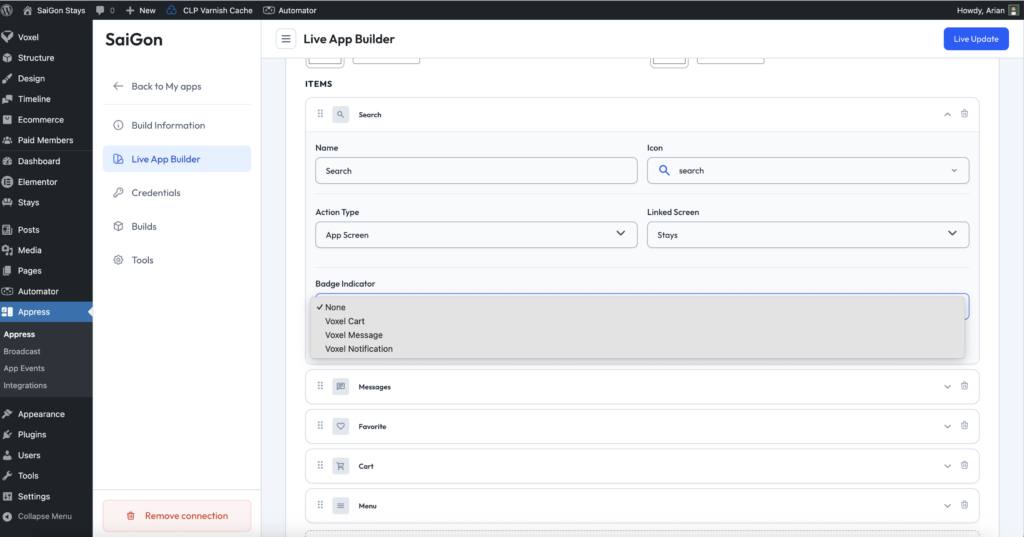
Indicator
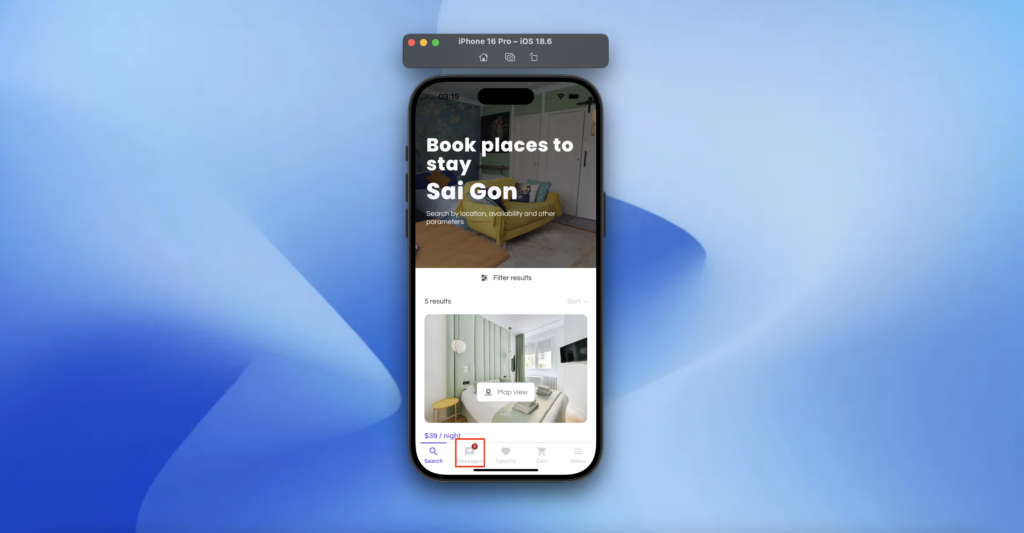
Indicators are used to display notification counts, similar to what you commonly see in mobile apps — for example, the number of unread messages. Appress currently supports indicators for Voxel and WooCommerce. You can also create custom indicators for any feature on your website using the provided hooks and filters.
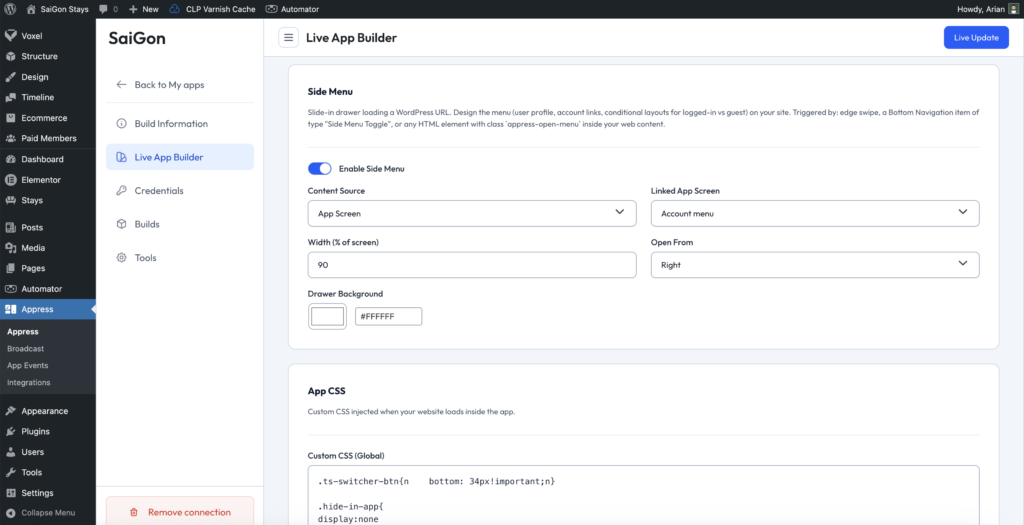
Side Menu
Side Menu is a component found in most modern mobile apps. In addition to the primary navigation in the bottom bar, your app usually needs a secondary navigation — for example, a user menu that displays differently for logged-in and logged-out users, with an avatar and items linking to various pages.
You can create an Appress screen (explained above) named Menu, use the visibility conditions from any page builder to control what’s shown, and add it to the Side Menu setting to use it as your app menu.
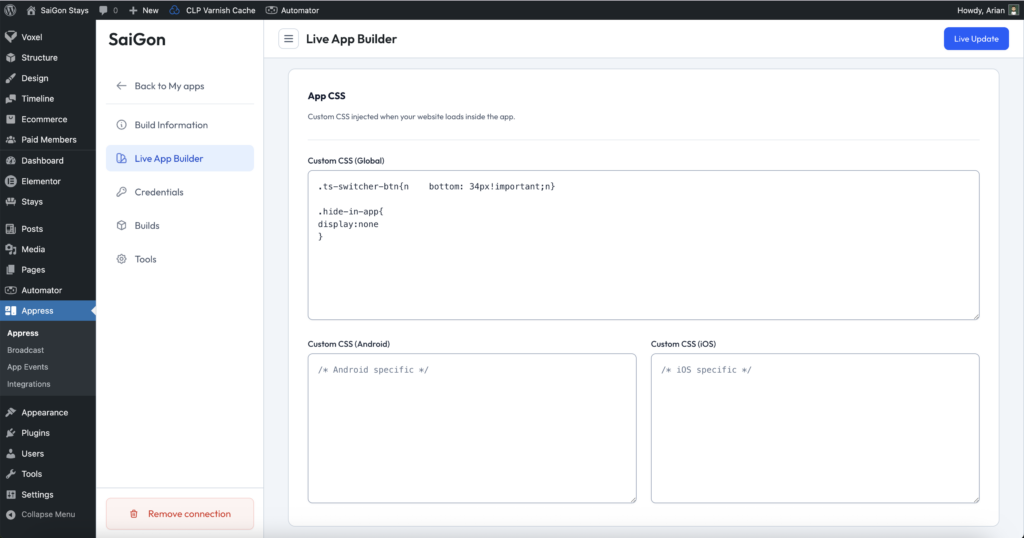
App CSS
Optimizing layouts and user experience for a mobile app is quite different from a website. While your website may show elements like the header, footer, and sidebars designed for a web layout, mobile apps need to feel simple and clean.
For this reason, in addition to the visibility conditions Appress integrates with Voxel, Elementor, and Bricks, you can also hide, show, or apply custom styles to any website element using App CSS.
Analytics
Since your WordPress website and the generated mobile app share the same data from your WordPress instance, traffic is tracked from both sources — including visits from the mobile app.
If you’d like to separate traffic data between your mobile app and your website, you can add a dedicated Google Analytics tag for the mobile app and exclude the tags running on your website.
Credentials
Credentials is where you manage the API keys for the services used on your website.
Google Play Store Publishing
To make managing your app’s build versions easier, Appress lets you enter your Google Play API key and submit or update your app directly to the store from the Appress dashboard.
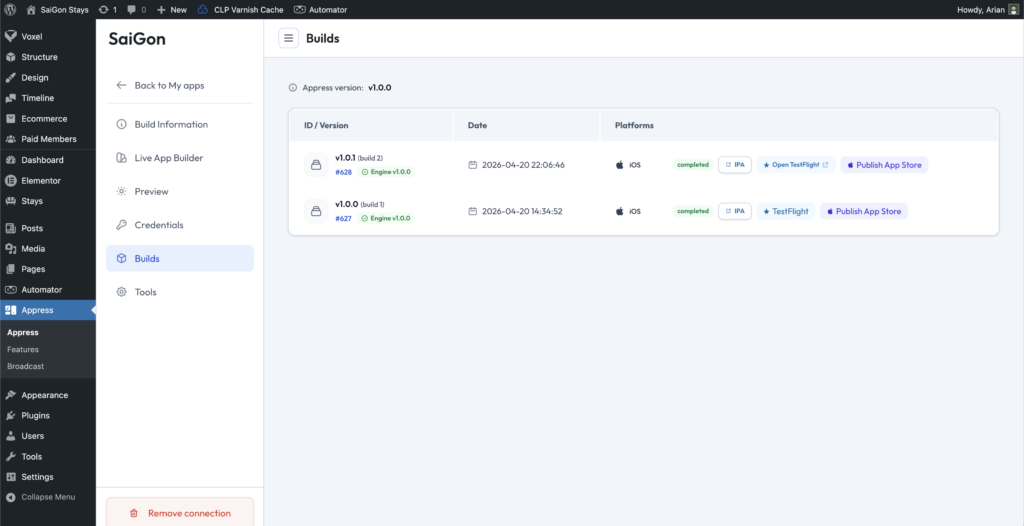
Builds
When you create a build request for your first app version or any subsequent updates, you can manage the list of versions and files in the Builds section.
From Builds, you can download the APK file for testing, upload the IPA file to TestFlight to test on iPhone devices, and submit your app versions for publishing to the App Store and Google Play.
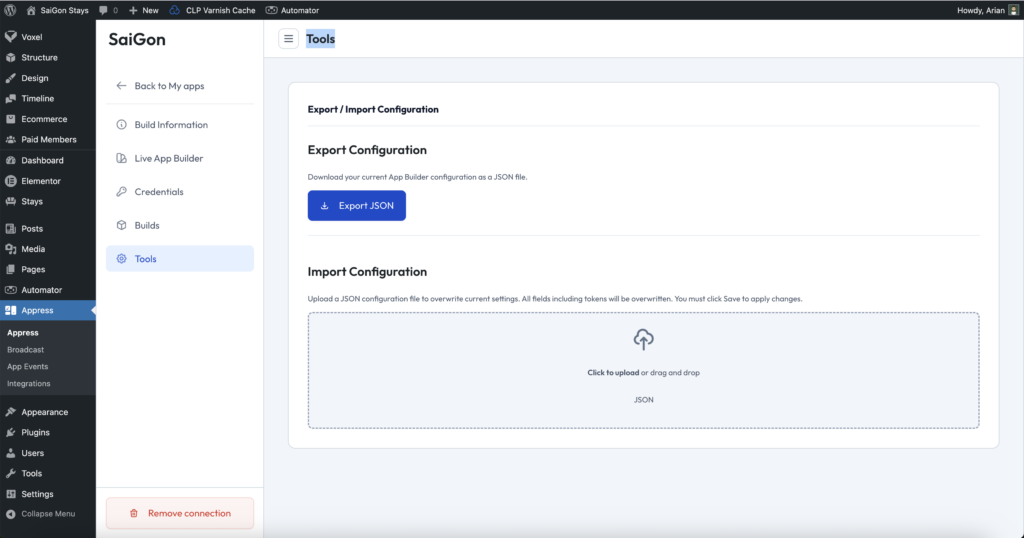
Tools